Introduction

Is your premises laced with 1-wire bus cabling? Wanting to add an ambient light sensor into the mix without running new cabling? This might just be for you.
This is the situation I found myself in recently. Unfortunately Maxim do not offer a light sensor with a 1-wire bus interface. There are however a few products with A/D converters which could be hijacked for an analogue light sensing apparatus i.e. the DS2438.
What I was really wanting however, is something like the popular VEML7700, an all digital sensor which gives a calibrated reading in lux. I really don’t want to run any more cables to attach one of these so was keen to see if I could get it onto an existing 1-wire bus.
There just so happens to be a solution: The DS28E17 which bridges from 1-wire to I2C. I first read about this chip a while ago and have been looking for an excuse to deploy it since.
There’s an added bonus interfacing with a DS28E17 in that we’re not hobbled by the VEML7700’s fixed slave address. A single bus can have as many as one pleases.
The DS28E17
To me the idea of bridging from 1-wire to I2C seems a little absurd, especially, in my case where I always use DS2482 I2C to 1-wire masters, so I’m going from I2C to 1-wire then back to I2C. Yup. Ridiculous. Anyway, this is all about limiting cabling, not optimum bus topologies.
To try and make this arrangement a bit more practical, the DS28E17 has been designed with performance in mind. Normally I2C controllers require a lot of programmed I/O from the CPU to perform each transaction. Not the DS28E17. With the controller on the end of a very slow 1-wire bus, it has to be a lot more autonomous.
Instead a detailed descriptor is setup with everything it needs to know to perform the transaction, the process kicked off and the host can return at a later time to collect the result. With 256 bytes of internal SRAM, it can both write and read quite a bit of data all in one transaction.
You could then, in theory, add another DS2482 I2C 1-wire master onto the back of the DS28E17 and have another 1-wire bus, and so on, bearing in mind that the protocol overhead increases by an order of magnitude at each step.
The biggest problem with the DS28E17 is that it’s a 3.3V part and only available in a miniscule QFN-16 package. Very annoying considering that most hobbyists use Vcc = 5V and aren’t generally too keen to try solder QFNs. All this isn’t a particularly big issue here. I found it was quite easy to solder down, and running it from a 5 volt supply / bus is also fairly straight forward. The VEML7700 is also limited to 3.3V so there’s going to be a step-down regulator on board anyway.
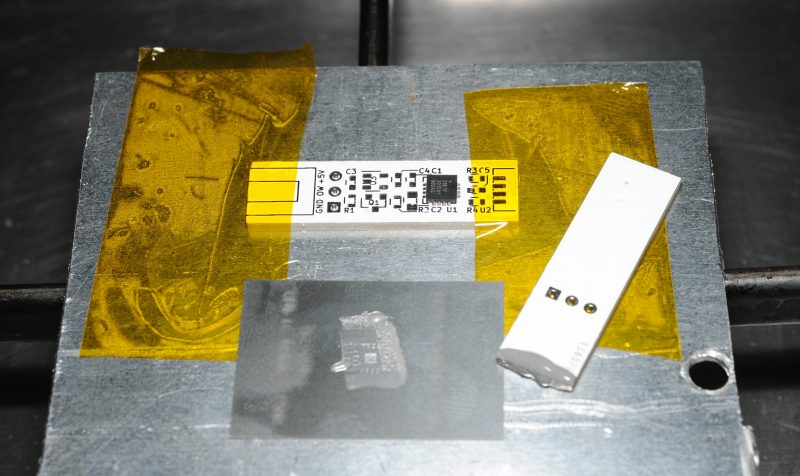
Soldering the DS28E17
There’s a few different ways to solder QFNs by hand. Check YouTube. Also, take a look at my method using paste and a stencil. Warning: It’s not for everybody.
Demo driver code

I haven’t got a full project to share this with, however I’ve put a demo repo up on github which shows how to use these combined with DS18B20 temperature sensors.
This carries my usual warning, that yes, it’s plugged into an Arduino, but the code I’ve shared is a ‘bare metal’ implementation only for the Uno. If you need this in Arduino studio, some porting would be needed.
The bus is connected to IO6 with a 2K2 pull-up resistor.

Parts list
- 1x VEML7700
- 1x DS28E17
- 1x 2N7002
- 1x LP2985-3.3
- 4x 0.1uF 0603 SMD Capacitors
- 1x 1uF 0805 SMD Capacitor
- 3x 4K7 0603 SMD Resistors
- 3 position 2.54mm header of your choice